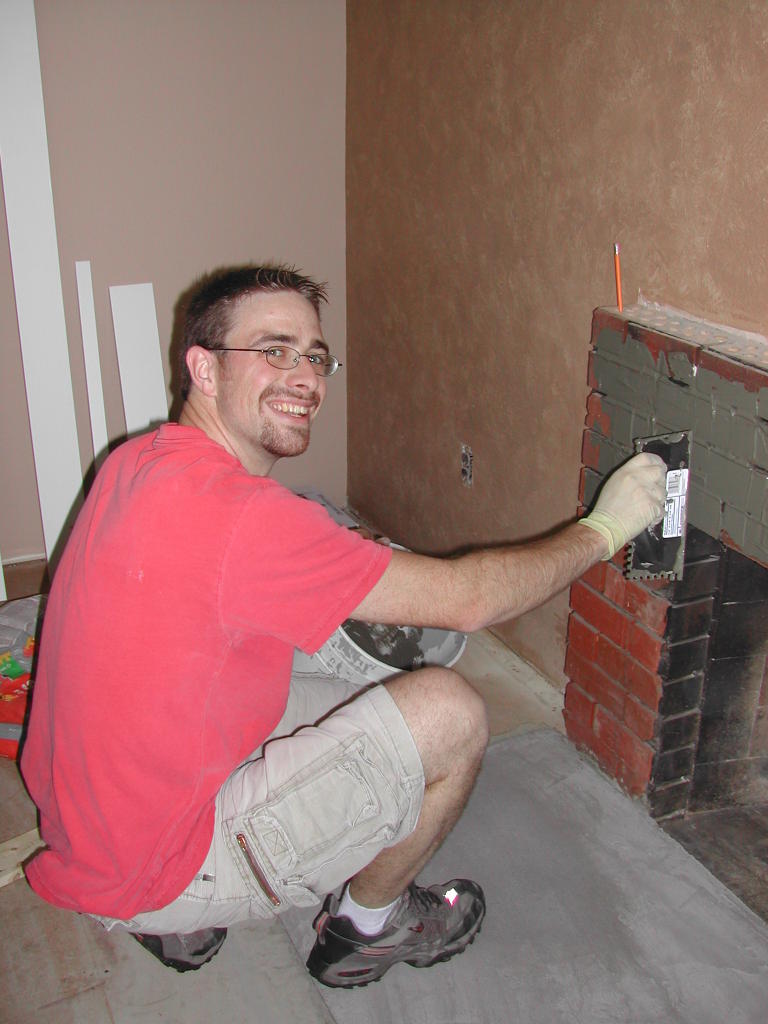
 Yesterday was a great day! I am just overwhelmed with how faithful God is with me. He has helped me through some challenging things as of lately. First of all, tiling the fireplace, I was really worried about how I was going to do it. So Kim and I have been praying, asking God to give me wisdom and the ability to do the job. Well, I am done setting the tile and it is looking really good. It was quite a process though.
It all started when I lined up the tile and a whole tile (13 inches square) wouldn’t fit up and around the fireplace. (See fig. 1) So I thought, “No big deal, I will just build up the side of the fireplace to be bigger.” That ended up being quite a feat. I had to cut the 2x4’s to the right size and then add a shim to square them up with the front of the fireplace. Then I had to figure out how to attach them to the fireplace with masonry screws. Add mortar, add backer board, add more mortar, add another layer of backer board and finally finish with a final coat of mortar to make the front surface flush. And PRESTO! I have a 13 inch wide fireplace.
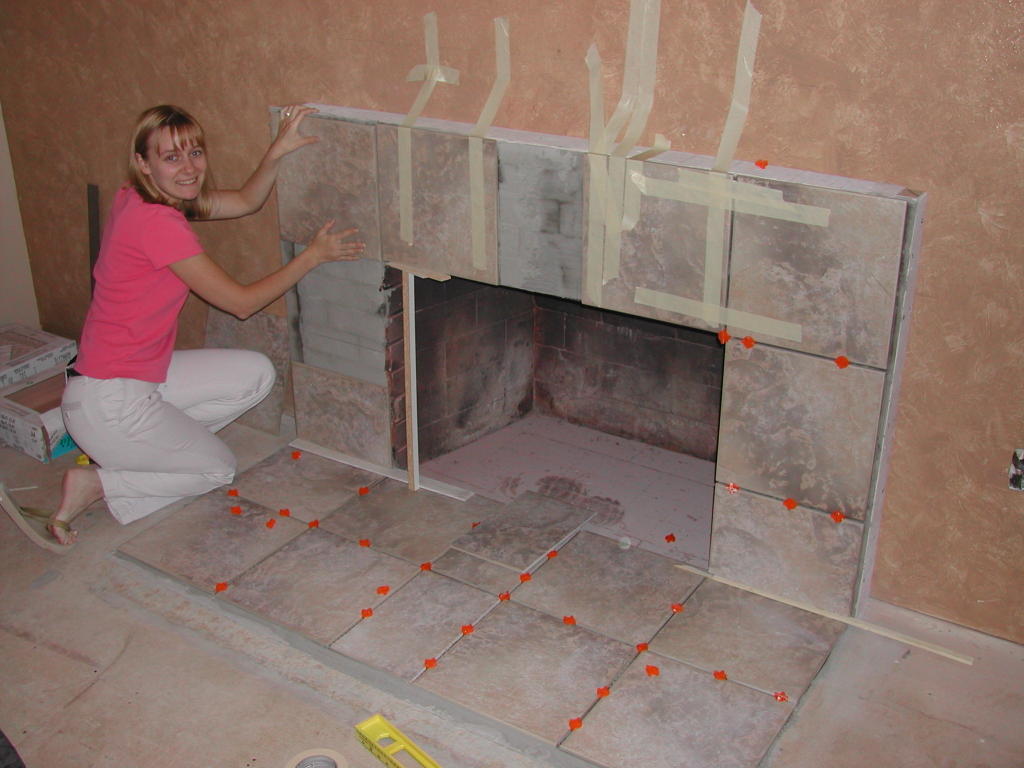
Compared to that mess, cutting and laying the tile on the wall was easy. Kim helped too! I used tape to hold the tile from shifting once I had them in position. I put a wood brace up under the middle tile too. Now I just pray that as they were curing none of them slipped.
To top it all off, my day at work yesterday was great as well. I can’t go into the details as of yet but I had some tough decisions to make. Kim and I prayed about the situation and God came through again. Everything worked out better than I could have imagined. I not only have saved money doing the tile myself, I am still employed and everything is going smoothly. Could I be more thankful right now? I don’t think so.
Fig. 1

1 comment:
Great photos. Nice to see Kim in the picture, and the fireplace looks great. Nice to see you in the pictures too!
Post a Comment